1959 BUICK SHROUD PANEL AND VENTILATING SYSTEM
1 -14 DESCRIPTION
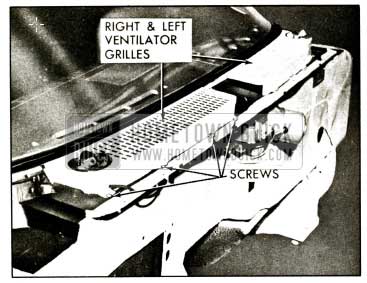
The body ventilating system incorporates the use of right and left air intake grilles located on top of the 1959 Buick shroud panel. The air entering the shroud top ventilator grilles flows through a duct which guides the air into the body through an opening at each shroud side duct panel air outlet door assembly. The flow of air into the body is regulated by a valve in each shroud side opening. Each valve is adjusted by the use of a cable and knob control. Water entering the air intake grille flows down the shroud side duct panel into a drain gutter which directs the water out of the body.
1959 Buick Shroud Ventilator Grilles
1-15 1959 BUICK SHROUD PANEL AND VENTILATOR ASSEMBLIES REMOVAL AND INSTALLATION
1959 Buick Shroud Top Ventilator Grilles – Removal and Installation – All Styles
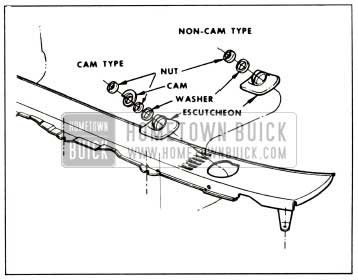
- Remove windshield wiper arm, spanner nut, washer and escutcheon from affected wiper transmission. See figure 1-46.
1959 Buick Windshield Wiper Transmissions
Use tool No. J-6592-01 to remove transmission nut. If present, detach washer hose from escutcheon prior to removing escutcheon.
NOTE: On styles equipped with Cam-o-matic transmissions, remove wiper arm, nut-to-cam, cam, nut-to-escutcheon.
NOTE: Exercise care so that grille doe s not contact hood.
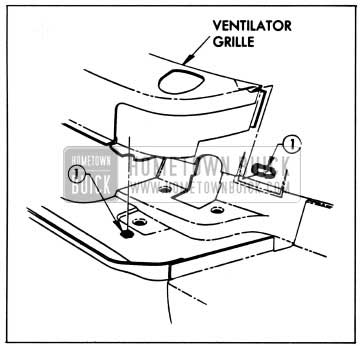
1959 Buick Ventilator Grille
NOTE: Exercise care so that grille does not contact hood.
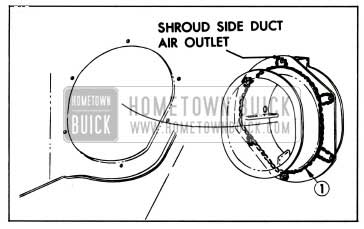
1959 Buick Shroud Side Duct Panel Air Outlet – Removal and Installation – All Styles
- Remove 1959 Buick shroud side foundation panel.
- Remove screws securing outlet door housing to shroud panel as shown in figure 1-48 and remove housing.
1959 Buick Sealing Shroud Side Ducts
NOTE: Air outlet is not present on left side of body equipped with air conditioning. A cover plate is used which is removed and installed in the same manner as the air outlet.
1959 Buick Shroud Side Duct Panel Air Outlet Door – Removal and Installation – All Styles
- Remove 1959 Buick shroud side panel.
- Remove end of control cable from pin indicated at “B” in figure 1-49.
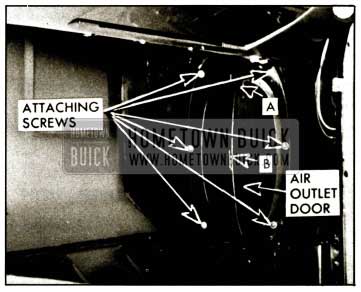
1959 Buick Shroud Side Duct Air Outlet
1959 Buick Shroud Side Foundation – Removal and Installation – All Styles
- Remove screw at upper and lower end of air inlet grille and bend down tabs securing foundation to floor pan.
- Slide foundation forward to disengage rear edge from retainer and remove from body.
- To install, reverse removal procedure.
Windshield Lower Corner Gutter Assembly – Removal and Installation – All 1959 except 37, 39 and 67 Styles
- Remove screws securing gutter assembly to body and remove assembly.
- To install, applying medium-bodied sealer to screw attaching holes as indicated at “2” and to rear inboard edge as indicated by “1” in figure 1-50 and reverse removal procedure.
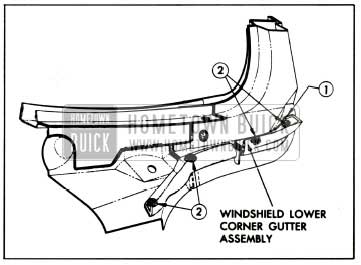
1959 Buick Sealing Windshield Lower Corner Gutter Assembly
Leave A Comment
You must be logged in to post a comment.