12-1 HOOD ASSEMBLY
The hood hinges and alignment procedure have been changed in 1956. The new spring and linkage require the following service changes.
Removal of Hood Assembly
- Support hood in extreme up position, preferably by chain fall if available.
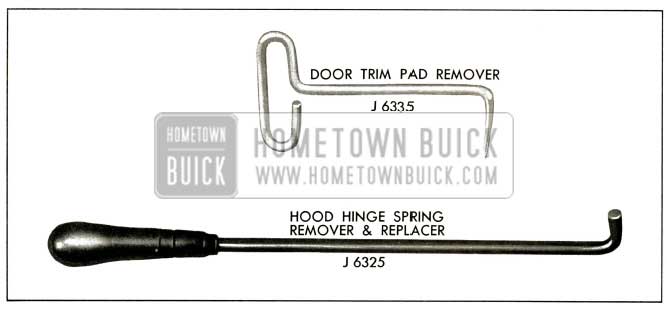
- Remove hood springs with remover and installer J-6325 by performing the following steps. See figure 12-1.
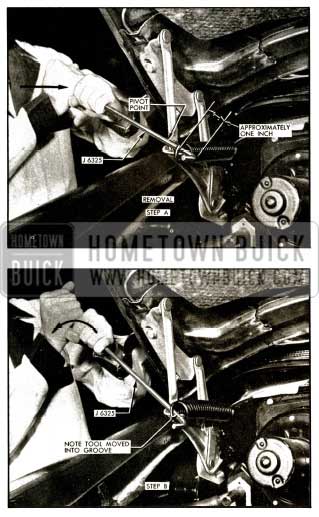
1956 Buick Removal of Hood Springs
Step A. Insert Remover and Installer J-6325 through loop in forward end of spring with bend of tool approximately one inch from loop. Pivot tool on hinge. Apply force as indicated by arrow, unseating spring from groove and move tool into groove. See figure 12-1 Step A.
Step B. Apply force as indicated by arrow and remove spring. See figure 12-1 Step B.
- Remove 4 hood hinge-to-body bolts (2 each side).
- Lift hood assembly from chassis.
Installation of Hood Assembly
- Replace 4 hood hinge-to-body bolts (2 each side).
NOTE: No adjustment possible or necessary when R&R hood assembly.
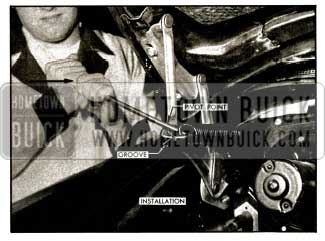
- Replace hood springs by inserting tool J-6325 through loop in forward end of spring. Pivot tool on hinge and apply force as indicated by arrow and loop spring into groove. See figure 12-2.
1956 Buick Installation of Hood Spring
NOTE: When removing hood for reasons other than replacing hood panel, it is recommended that the preceding method be used as it eliminates the necessity of alignment and adjustment.
12-2 HOOD PANEL
Removal of Hood Panel
- Support hood, preferably by chain fall if available.
- Scribe washer positions prior to removal of hinge-to-hood bolts, to facilitate alignment when replacing panel. Remove 4 hinge-to-hood bolts. (2 each side).
- Lift hood panel from chassis.
Installation of Hood Panel
- Replace four hood-to-hinge bolts.
- If rear of hood sets high (does not pull down to shroud), add a shim between the hood and hood hinge bracket at front bolt.
- If rear of hood sets too low, add a shim between the hood and hood hinge bracket at the rear bolt.
- Close hood and align.
- Raise hood carefully taking care not to misalign and secure hinge-to-hood bolts.
12-3 FRAME
Frames for 1956 have been revised in that they provide for the installation of direct acting rear shock absorbers. This was accomplished by redesigning the rear spring cross member. The new design also adds strength to the side rails and cross member.
The stock thickness of the side rails and cross member of the 40 and 60 Models has been increased to give the frames added rigidity. The stock thickness of the front center cross member extensions and side rails have been increased on the convertible frames to increase their rigidity.
The junction of the front cross member, the front extension and the side rails have been revised in order to add strength at this point.
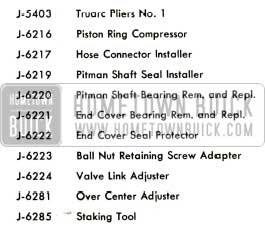
NEW TOOLS FOR REAR AXLE
1956 Buick Rear Axle Tools
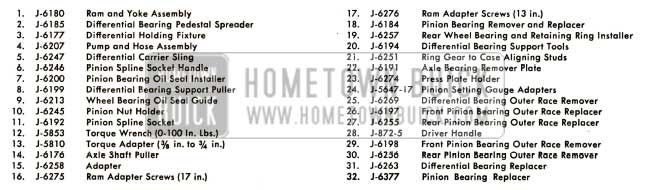
1956 Buick Rear Axle Tools Legend
NEW 1956 POWER STEERING GEAR TOOLS
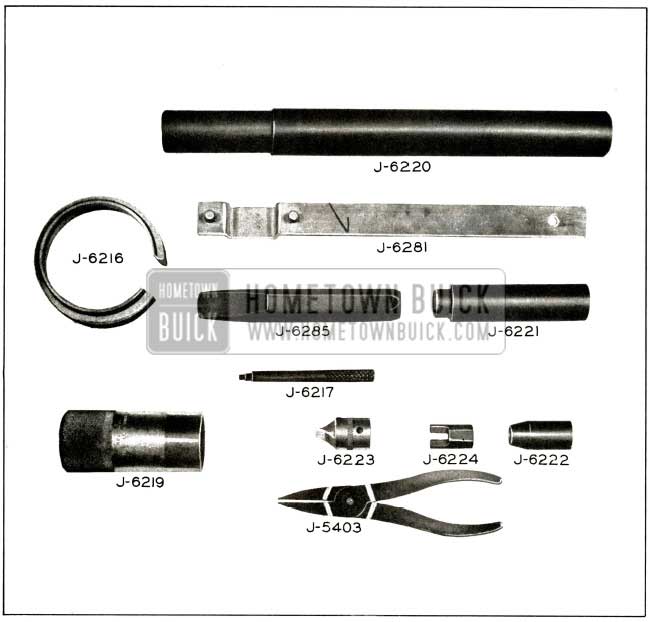
1956 Buick Power Steering Gear Tools
1956 Buick Power Steering Gear Tools Legend
NEW 1956 POWER STEERING PUMP TOOLS
1956 Buick Power Steering Pump Tools
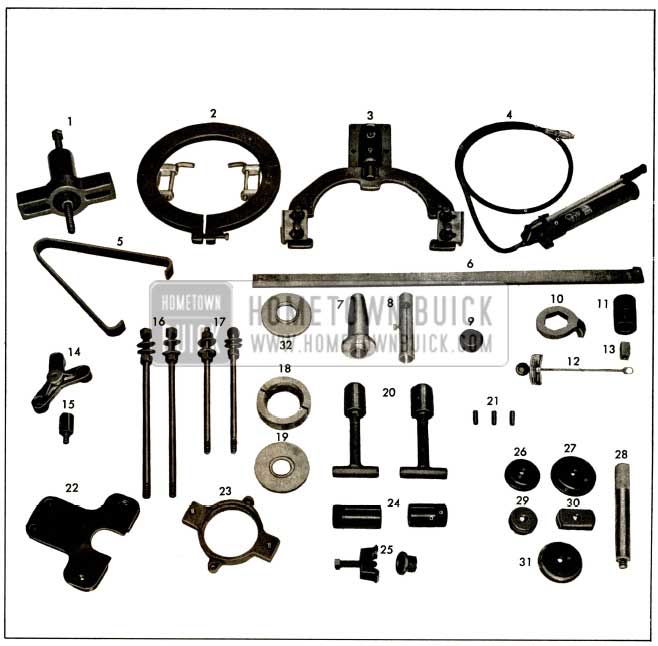
NEW AIR CONDITIONING TOOLS-1956
1956 Buick Airconditioning Tools
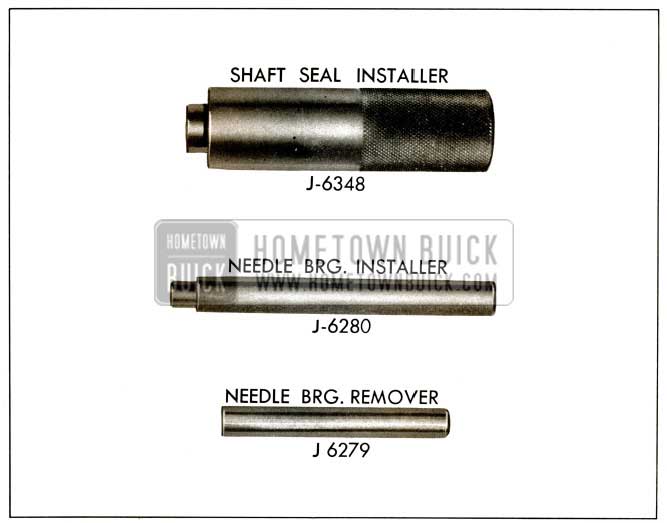
J-6323-Ciutch Plate Installer
J-6320- Pilot Bushing
J-6322-Ciutch Plate PullerMISCELLANEOUS TOOLS-1956
1956 Buick Service Tools
Leave A Comment
You must be logged in to post a comment.