1951 Buick Recommended Bench Layout
a. Solvents
The type of solvent required for 1951 Buick Hydraulic Valve Lifters cleaning should be of a varnish removing nature. For ease of operation it should either dissolve the varnish accumulation on lifter parts or soften it within an hour so that it may be removed by wiping action. Gulf Motor Flush or its equivalent works very well as a solvent for this type of work.
Some solvents that are very effective are also dangerous to use. For this reason discretion should be used when selecting a solvent. Always follow the manufacturer’s directions and safety precautions. Some solvents are not injurious, but all of them tend to remove the natural oils from the skin so that they will sometimes cause a rash. If rubber gloves are used, this disadvantage can be eliminated.
Anyone working with these solvents should find out from the manufacturer what safety precautions should be taken and what antidotes should be used to counteract them. If the solvent is dangerous in any way, a sign should be posted in the vicinity where it is being used to inform any out siders of the dangers involved.
b. Kerosene Flushes
Due to the fact that cleanliness is of prime importance when assembling lifters, two compartments are provided for kerosene. Lint and dust will adhere to the lifter parts prior to assembly and the best way to remove them is to dip the parts in each flush to insure cleanliness and to provide lubrication for the plunger when it is installed in the body.
c. Cleaning Tools
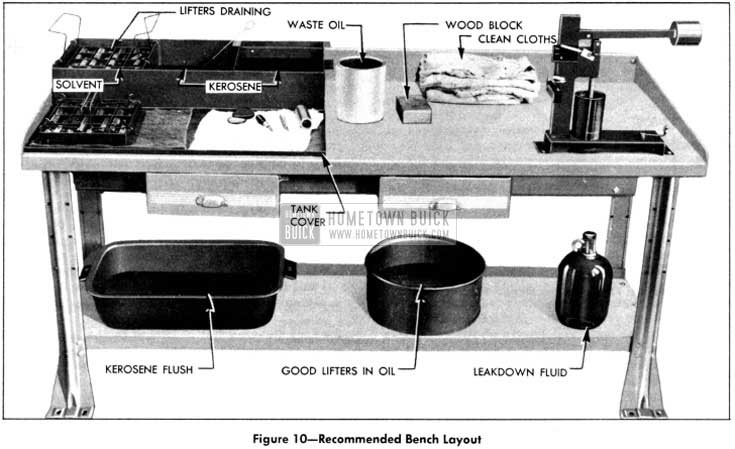
The Cleaning Tank and Trays, J-5093, are pro vided to hold the solvent and two kerosene flushes. The trays have 16 compartments, for one complete set, each of which will hold a disassembled lifter. The Lifter Body Cleaning Brush J -5099 effectively cleans the bore of the lifter body.
These tools are shown in Figure 10 which illustrates the recommended bench layout. A separate bench should be set up for the cleaning and handling of lifters.
The solvent is placed in the compartment on the left hand side with the kerosene flushes in the other two compartments. Normally, 1 1/2 gallons in each compartment will last for a considerable length of time if reasonable attention is paid to cleanliness.
d. Disassembly of Lifters
After the lifters are removed from a job they should be disassembled for proper 1951 Buick Hydraulic Valve Lifters cleaning in the following manner:
- The Plunger Depressor J -5097 has a spring loaded pin which is placed in the oil hole in the push rod seat. This pin keeps the ball from seating, allowing the plunger to be de pressed easily for the removal of the plunger retainer. See Figure 11.
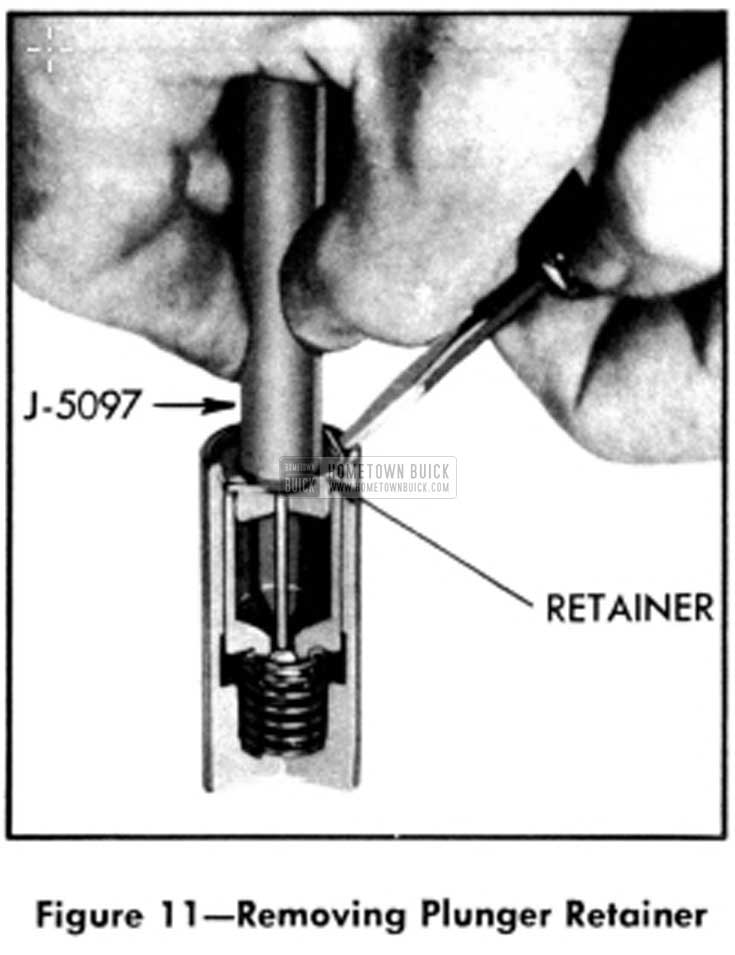
1951 Buick Removing Plunger Retainer

1951 Buick Removing Stuck Plunger
e. 1951 Buick Hydraulic Valve Lifters Cleaning Procedure
The following procedure will work effectively in most cases, but is somewhat dependent on the solvent used.
- A pan large enough to rinse a tray full of lifters in kerosene should be placed in the near vicinity of the bench. Rinse the tray full of lifters in the kerosene prior to immersing it in the solvent solution to remove as much of the oil as possible. If this is not done, the solvent will become contaminated and lose its effectiveness prematurely.
- Soak the tray full of lifters in the solvent for approximately one hour. The second tray is provided so that another set of lifters may be readied for the solvent while the first set is soaking. See Figure 13.
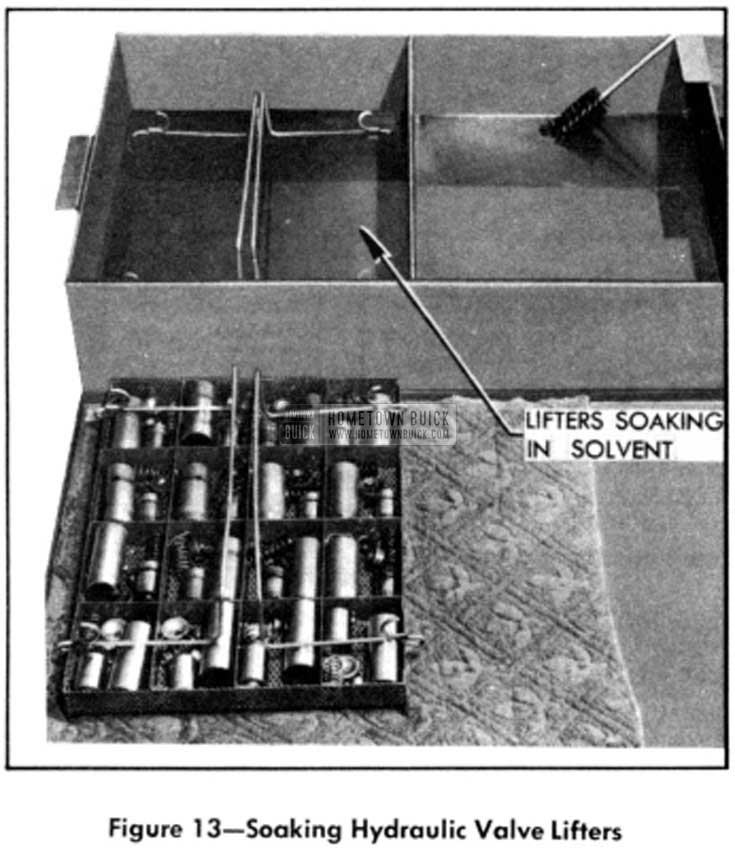
1951 Buick Soaking Hydraulic Valve Lifters
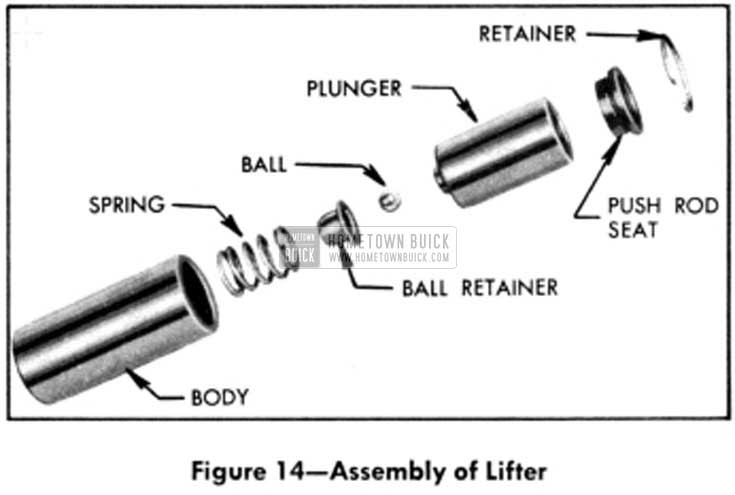
1951 Buick Assembly of Lifter
Leave A Comment
You must be logged in to post a comment.